So you’ve become one of the few dreamers to actually pull the trigger on starting your Amazon business. Congratulations! If you’re at this stage of the game, you’ve probably done lots of research on a product, coordinated with your supplier, and placed your first order.
This is actually happening!
It’s tempting now to sit down and wipe the cyber sweat off your forehead. You’ve worked hard, pushed through obstacles, and achieved the most important part of starting your own Amazon business. Pour a keg of Gatorade over your head and celebrate!
But while you do deserve both an “attaboy” and a pat on the back, you don’t want to just sit there while your product is being processed and shipped. Once you’ve placed your order, the clock starts to tick, meaning that it’s almost show time. And the last thing you want is to have your perfectly researched product presented to potential customers in a mediocre way.
So if you want to get a great head start on your new product, you can use the six to eight weeks to tackle some really high-yield tasks. These will make your product’s transition from the assembly line to your Amazon listing much smoother, and it will lower your own level of anxiety leading up to your first day of sales.
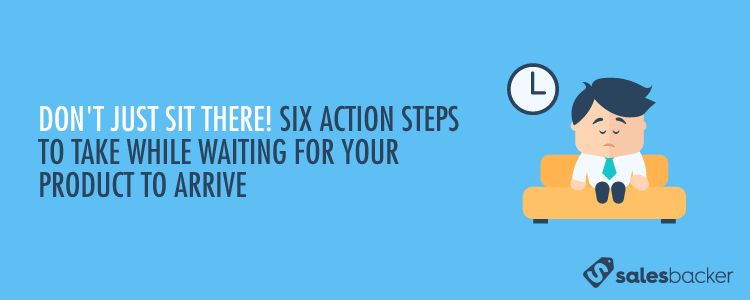
Here are six action steps you can take during the six weeks leading up to your product arrival. If you can accomplish one of these each week, you’ll be on your way to having a great head start in your Amazon business.
WEEK #1: KEYWORD RESEARCH
One of the most essential tasks you now have before you is to start digging deep into keyword research. Since at this point you’re still 6 weeks away from “game time”, you won’t feel as much pressure to rush this task. Take your time this week, and gather the important data you need to put together an awesome listing.
Unfortunately, many Amazon sellers put the least amount of effort into studying the keywords for their product, and they end up getting poor results. So this week, spend about 30 minutes each day researching and recording information about your keywords. I suggest 30 minutes for two reasons: First, you may be still working a full-time job so your time is limited, and secondly, your brain will go numb after an hour of research. Give yourself time to mull over your findings.
WEEK #2: WRITE A KEYWORD-RICH PRODUCT LISTING
After you’ve spent a week creating a great list of keywords, it’s time to put them into your actual Amazon listing. Unfortunately, Amazon doesn’t allow you to just copy and paste your keywords into your listing. It has to fit within their format. So it’s time to get busy figuring out how to optimize your listing with the keywords you’ve uncovered.
As you work your way through your listing, keep in mind that you don’t need to repeat keywords. That doesn’t mean you can’t repeat them, but it simply means repeating keywords doesn’t help your site. For example, if you use the keyword “rechargeable” in your listing title, there’s no need to place “rechargeable” in your bullet listings.
I’d suggest working in order from your listing title to your product bullets to your product detail section. Use your most important keywords in the title, then begin sprinkling in your other top keywords throughout your bullets and your details. Remember, the goal is not only to include as many keywords as possible but also to write good sales copy. Try to highlight the benefits your customers receive from using your product, not just the features of your product.
WEEK #3: SET UP YOUR AMAZON PPC ADVERTISING CAMPAIGN
This may seem a little strange to do when your product listing isn’t even up yet, but trust me. If you have your Amazon PPC campaign set to go weeks before your product arrives, you’ll be excelling beyond the majority of Amazon sellers who are winging their product launch as they go. And don’t forget - you’ll be determining when your PPC campaign starts, so you won’t be paying for ads until your campaign start date arrives.
Since your keywords have been researched and used to optimize your listing, take that same research and use it as fuel for your Amazon sponsored ads. Sponsored ads are based on the same keyword research that you did for the previous two tasks, so use that work while it’s fresh on your mind.
Remember that PPC campaigns are not usually over-night miracle pills for your listing. But they are the first place to begin gathering data on what customers are specifically searching for. Once you’re sponsored ads begin to run, you’ll want to evaluate the results after three to four weeks.
If Amazon Sponsored Ads are new for you, we’ve got you covered. Our article, How to Set Up an Amazon PPC Campaign, will walk you through the process a step at a time.
WEEK #4: DETERMINE YOUR METHOD OF GETTING REVIEWS
If you’ve studied Amazon selling for any amount of time, you know that reviews are a key tool (but not the only one) to boosting your sales rank. Before your product hits Amazon’s cyber shelves, you’ll want to map out your plan to collecting great reviews.
Before you jump into developing your review strategy, be sure to find out how Amazon’s rules have changed concerning giveaways and reviews. If you don’t know how these rules work, check out Scott Voelker’s podcast on the topic at The Amazing Seller. He does a great job of pointing out 5 myths about Amazon reviews and giveaways.
It’s still possible to gather initial reviews by reaching out to your family and friends with free or discounted products. And it’s also possible to enter your product into giveaway sites and programs. But to get even better reviews, you may want to tap into the top-rated reviewers currently on Amazon. To do this, check out our blog post on the step by step guide to getting product reviews from top Amazon reviewers.
However, for a long term strategy, you’ll want to connect to customers who are buying your product and will give honest feedback. One of the best ways to do this on Amazon is to automate your correspondence with review-friendly emails. And that’s exactly what Salesbacker helps you do — automate email sequences and gather more reviews faster. In week four, you may want to go ahead and sign up for our free 30 day trial here.
WEEK #5: SCHEDULE OUT SOCIAL MEDIA POSTS FOR ONE MONTH
Though social media posts may not have an immediate effect on your Amazon sales, they can become a valuable tool for advertising your product and brand viability. Since you have the time, use week four to start scheduling out one month of posts in advance.
This means that you’ll need to set up accounts for the social media platforms on which you’d like to initially focus. In my opinion, start with one or two that can be easily automated from the beginning. Once you’re comfortable with those, then add a third or fourth.
When you’ve set up your social media accounts, you’ll want to additionally sign up for a social media automation software. My suggestion would be to use HootSuite which allows you to schedule out your social media posts across several different platforms. Simply create an account for free, sync your social media pages to the account, and schedule out your posts from one location.
Because your first month of Amazon sales can become a bit hectic, it will be a relief to know that your social media has already been taken care of.
WEEK #6: DEVELOP A PERSONAL WORKFLOW SYSTEM FOR YOUR FIRST MONTH
This task is making the assumption that you’re like a lot of first time Amazon sellers. You are a one or two person team trying to get this baby off the ground. This means you’ll more than likely be initially working another job, and it definitely means you’ll be strapped for time. So before you let adrenaline determine your direction, use week six to develop your own system of productivity.
Simply hoping that you’ll get it all done won’t work. You have to plan it well for it to go well. So begin by writing out a list of tasks that you need to accomplish each day. Keep in mind that during your first month of sales for your first product, you’ll be doing a lot of “checking in” on things to see how they’re going. It’s your product’s first flight, and you’ll want to make sure all systems are go. So your list may look like this:
Check sales
Check inventory
Check reviews
Check Social Media posts
Check Customer Feedback
Check Customer Messages
Check Sponsored Ads Campaign
The tendency for first time sellers is to do these tasks on the fly. They know they need to be done, but they don’t know an exact day or time they’ll do them. This leads to a large amount of unnecessary anxiety on the shoulders of one or two people selling a single product.
So if you have a business partner, determine who will take care of what tasks ahead of time. If you are flying solo, go ahead and place a time next to each of these tasks, keeping in mind that most do not take very long to accomplish.
Of course, you’ll eventually be able to add more tasks to this sample list, but the point remains. The earlier you begin systemizing your work the better. Start creating processes now when you have a single product, and the task will be easier when you’ve added three or four more.
Conclusion
My first days of Amazon were filled with one, primary question: What am I supposed to be doing? I was happy to work, but I couldn’t quite put my finger on what I should be working on. Unfortunately, the end result was often panicked running from one “urgent” task to the other.
I don’t want to see you running that same routine. Use these six action steps to get a jump on your Amazon competition. When that starting gun goes off, you don’t want to still be lacing up your shoes. Maximize your launch date by working while you’re waiting!