What are Coupons?
Amazon offers sellers an option to create digital coupons, which are similar to the coupons customers are used to using in brick and mortar stores but differ from other promotional opportunities within Seller Central. This option is just one more way to promote your business by offering your customers a discount on your products. With coupons you can choose between a percent off discount, or a dollar off discount.
The Benefits of Using Coupons to Promote Your Products
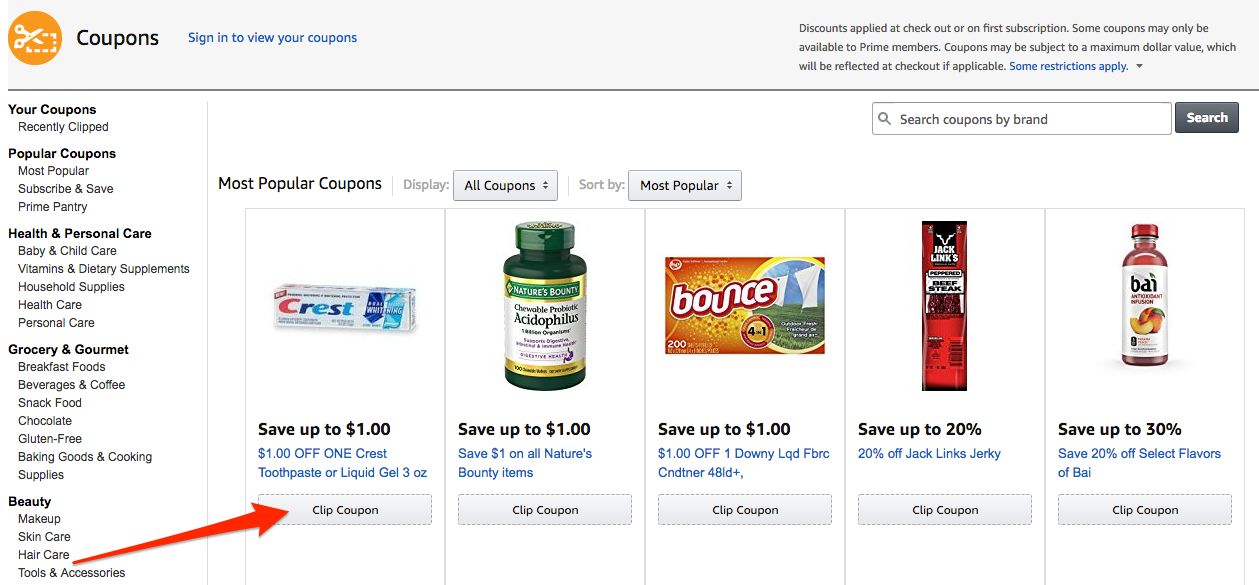
Coupons are an easy and effective way to promote the products you sell on Amazon. When you apply a coupon to one of your products, the coupon appears on the product detail page, in search results, on the Gold Box Deals page, as well as on a separate dedicated landing page just for coupons.
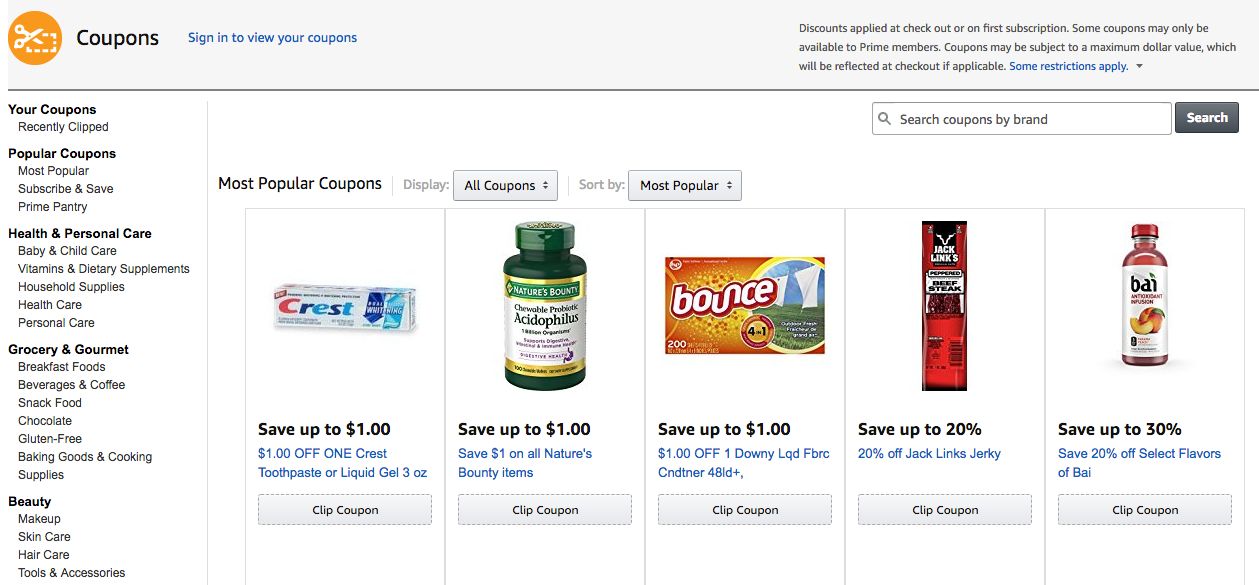
It is super easy for customers to apply a coupon discount to their purchase. The customer simply clicks on the button to “clip” the coupon, which then automatically applies the discount to the customer's’ account. Then, whenever the customer adds that product to their shopping cart, they will receive the discounted price from the coupon that is applied.
How to Create Coupons for Your Products
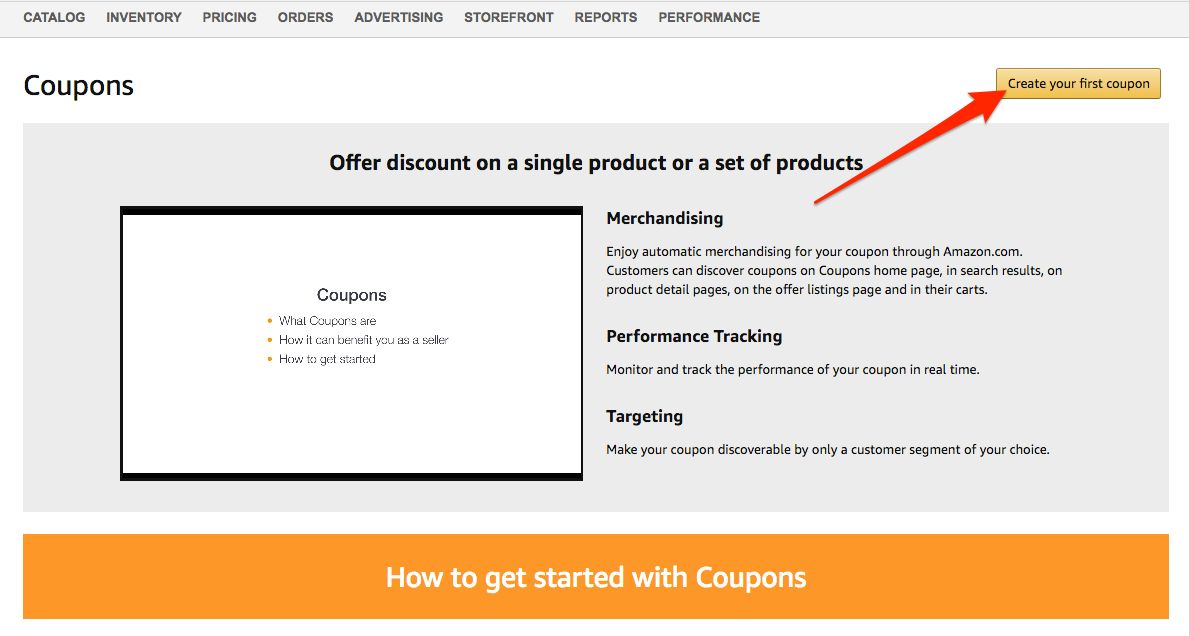
To create coupons for your products, you’ll first start by logging in to your Seller Central account. From the home page, select Coupons from the Advertising dropdown menu.

You’ll then be taken to a page that gives you an overview on coupons and a high level description of how they work and how to set them up. To get started with creating a coupon, you’ll need to click on the Create your first coupon button.
You’ll next be taken through the four-step coupon creation process.
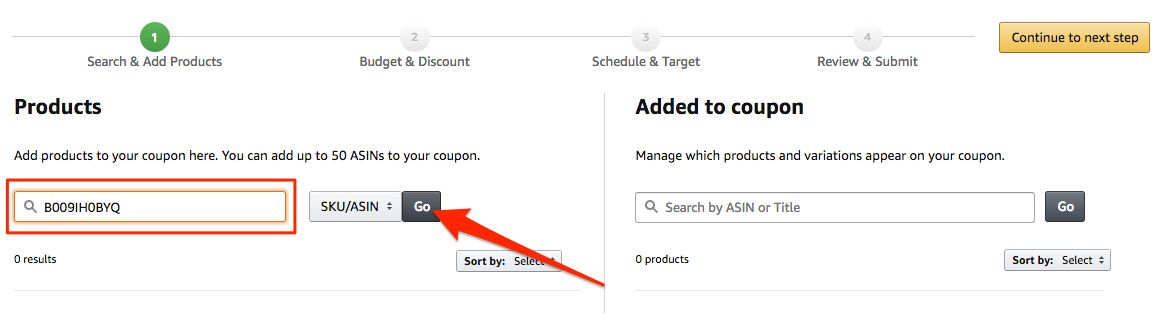
Step 1: Search and Add Products
To create a coupon for your product, you’ll begin by searching for the product either by SKU or ASIN. Once you’ve entered in the identifier, click the Go button.
You’ll then see your product listed, and you’ll click on the Add to coupon button to add that particular product to your coupon.
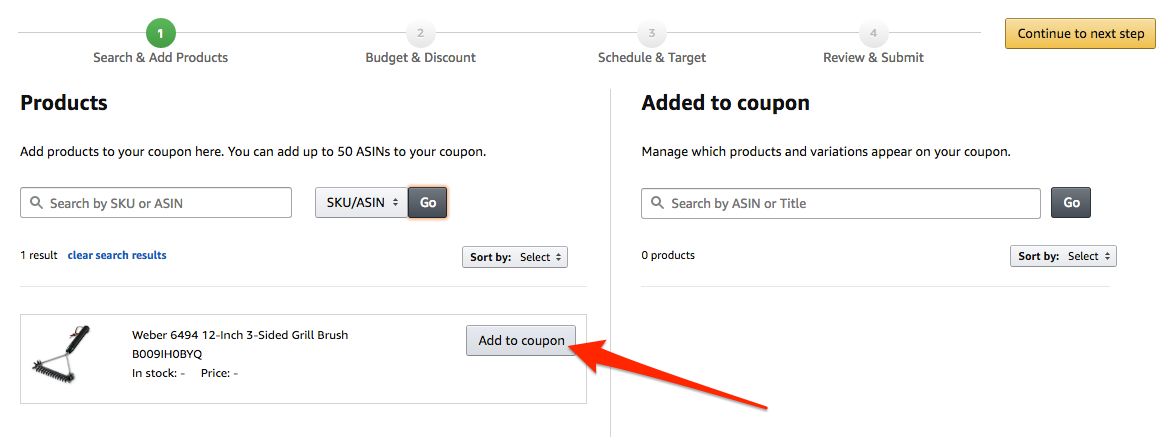
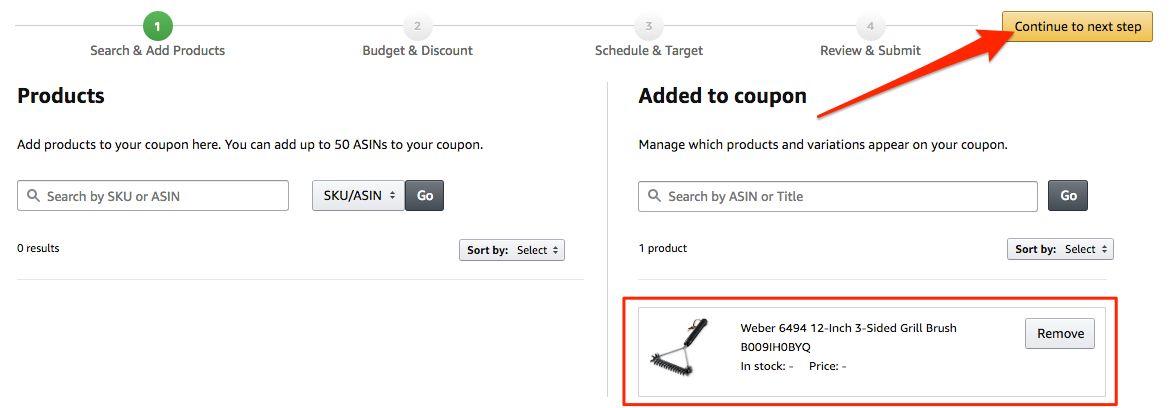
The product will then appear in the Added to coupon section on the right of the screen. If you want to add more than one product or variation of a product to your coupon, you can repeat the last step of searching for the product by SKU or ASIN and adding the product to the coupon. Once you’ve added all of the relevant products to your coupon, click on the Continue to next step button.
Step 2: Set the Budget and Discount for your Coupon
In the next step you will be able to set the budget and discount specifics for your coupon. First, choose between a Money off and a Percentage off discount, and then type out the specifics for your discount. For example, if you choose a Percent off discount, you’ll enter the specific percent discount you want to offer.
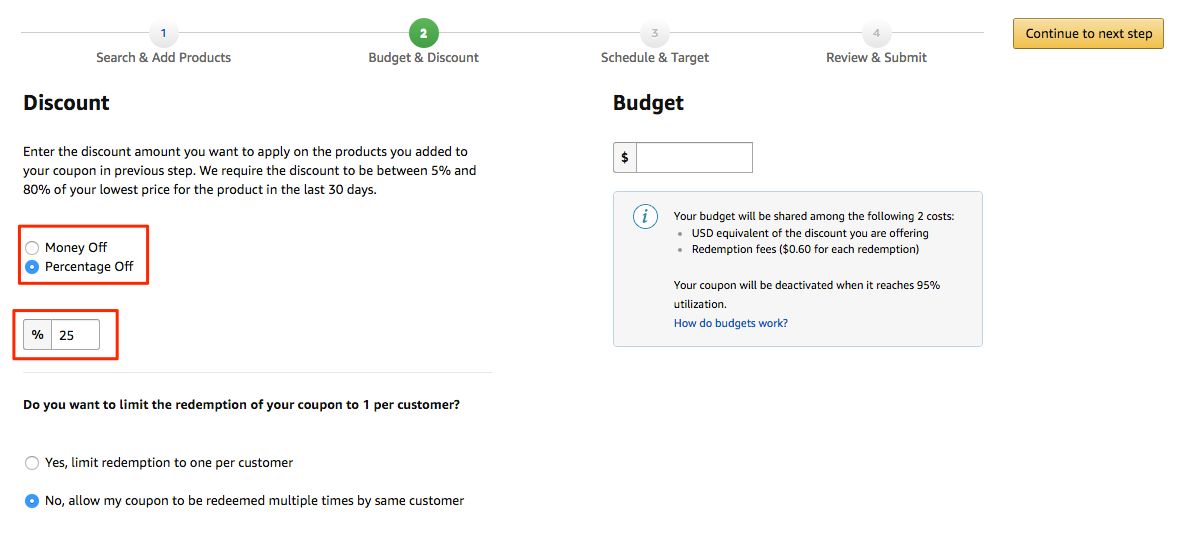
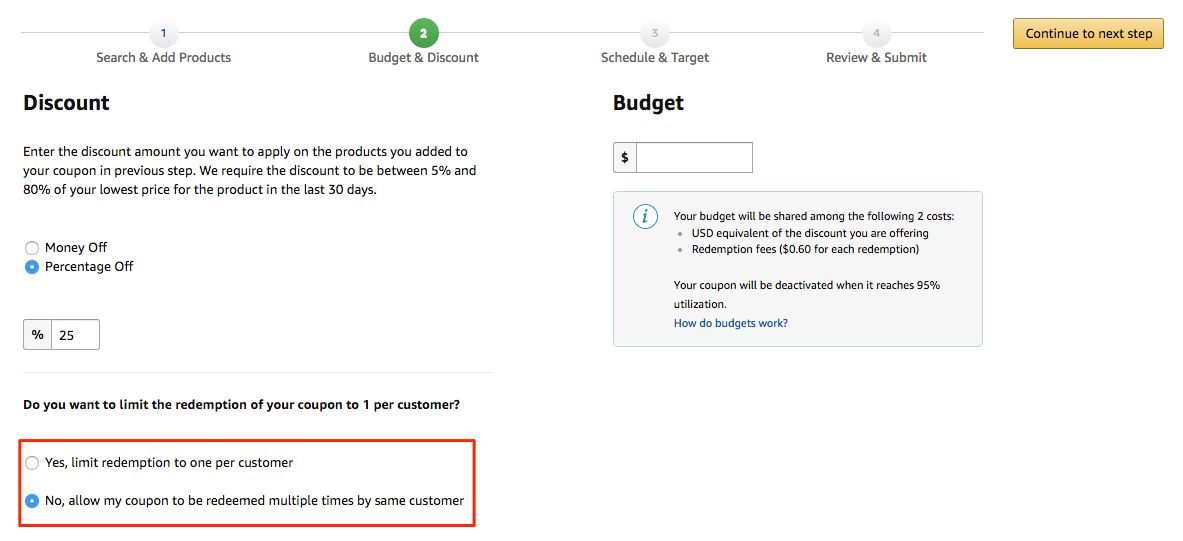
You’ll next want to specify whether or not to apply a redemption limitation to your coupon. You can either limit a coupon usage to one redemption per customer, or you can allow your coupon to be redeemed multiple times by the same customer.
You’ll next set the budget for your coupon. This creates a limitation on how much of a financial investment you are willing to make for this single coupon.
There are two elements that go into the budget calculation, and you should consider both when you set the budget for your coupon.
- USD equivalent of the discount you are offering to customers
- Redemption fees ($0.60 for every redemption) charged by Amazon
Here is an example of how this works. Say your coupon is for 25% off of a $20 item. This results in a $5 discount per coupon redemption, in addition to a $0.60 redemption fee charged by Amazon. So, the total cost to your budget per redemption is $5.60. If you see 50 coupons redeemed in a single day, your cost for these redemptions is 50 * $5.60 = $280.
So, when setting your budget, consider the total investment you are willing to make from the perspective of the discount on your product as well as the redemption fees charged by Amazon. Once your budget is 95% utilized, your coupon will be taken offline to avoid scenarios where your coupon campaign goes over budget.
Once you’ve determined the total budget for your coupon, enter the amount into the Budget field, and then click on the Continue to next step button to continue to the next step and create your coupon.

Step 3: Schedule and Target your Coupon
The first field to complete in step 3 is the Coupon title field. You’ll see an example as well as guidelines you can review to assist you in creating the best title for your coupon.
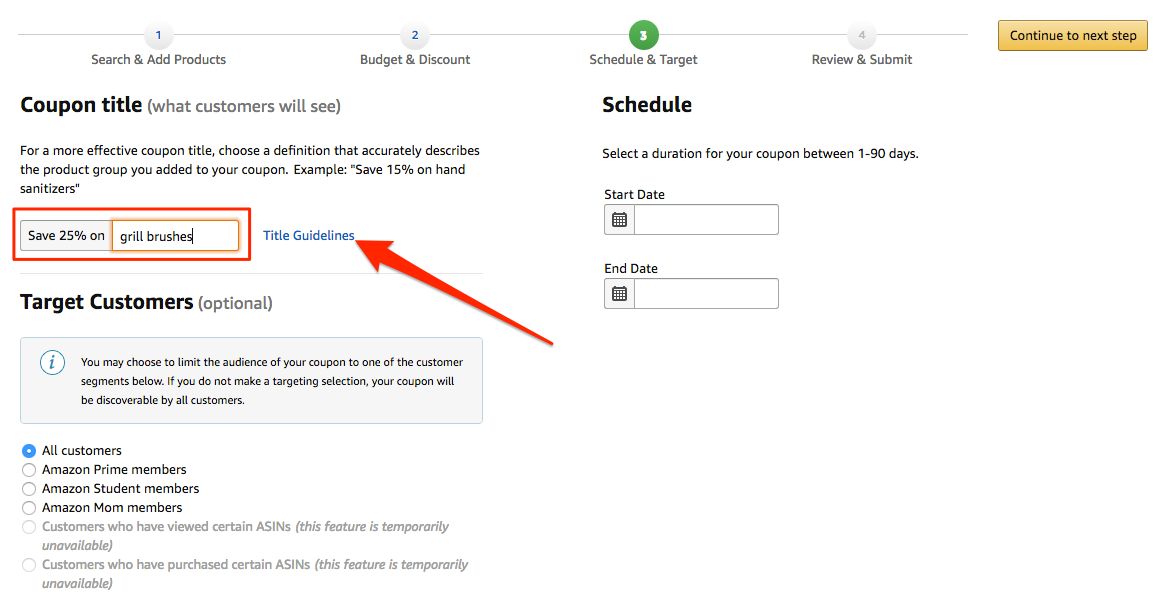
You can also target specific groups of customers such as Prime members, Amazon Student members, or Amazon Mom members if you wish to. This step is not required, and if you do not specify targeting, your coupon will be visible to all customers.

Next, you will set a start and end date for your coupon. Your coupon can be active anywhere from 1 to 90 days. Once you’ve set a start and end date, click on the Continue to next step button.

Step 4: Review and Submit
Before you submit your coupon, you’ll be taken to a screen where you can review all of the details of your coupon and view a preview of what your coupon will look like. Read through and review all of the information in this section. Once you are sure all of the details are correct, click on the Submit coupon button.

Congrats! You’ve now created your coupon.
More Promotional Opportunities:
Amazon offers many ways to provide discounts and incentives to your customers to buy your products. Here are a few other opportunities you can participate in:
- How to create an Amazon Promotion
- How to create single use promo codes
- How to run a lightning deal on Amazon
- How to run an Amazon giveaway
- How to participate in subscribe and save
- How to use Amazon social media promo codes
Make the Most of Increased Sales from Coupons
Anytime you run a promotion and discount your pricing, such as with a coupon, there is a chance you’ll see a big spike in sales. While getting increased sales is a huge benefit of running a promotion, be sure you are getting the most out of your investment by taking advantage of the increased sales volume to grow the number of reviews for your products. The more reviews your product listing has, the more information potential customers have at their fingertips to make a smart and informed purchasing decision. By using Salesbacker, you can automate the process of emailing each customer who purchases your product to ask them to provide you with their feedback in the form of a product review. If you aren’t already using Salesbacker, before you create a coupon for your product be sure to sign up for your free 30-day trial of Salesbacker and position yourself to get the most benefit possible out of your coupon promotion.