Updated: October 2017
Promotions are a great way to generate more sales on Amazon. You can also drive more sales on your product listings by getting more product reviews. Use Salesbacker to automatically ask your customers for a product review. It's simple and free to start.
If you’re just launching your first product or if you’re on to your second or third, promotional coupons are a great way to get product feedback from customers. Initially offering your product for an extremely low price will provide an incentive for friends, family members, or random customers to test out your product. But if you’re going to offer discounts, you have to be able to set up promotional codes within your Seller Central account.
So follow along as we take you step by step through the process. If you’re completely new to this process, please read all of the instructions as some of the most important steps are near the end of the process.
A Step-by-Step Guide to Setting Up A Promotion for Your Amazon Page
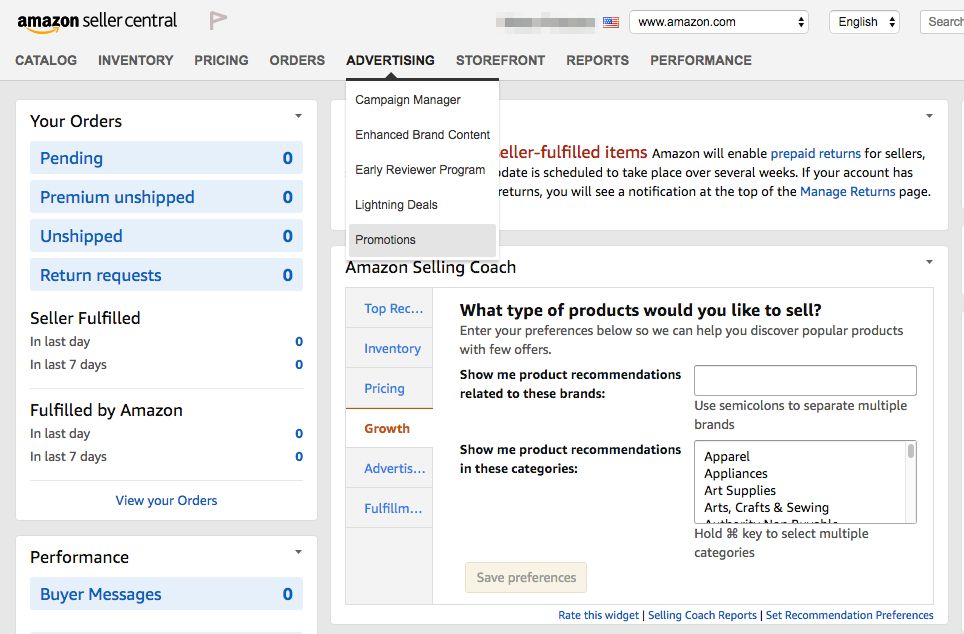
1. Log in to your Seller Central Account and hover over the Advertising menu on the top of the page. From the drop down menu, choose Promotions.
2. On the Promotions page, we’ll be using the initial Create a Promotion tab which offers four choices - Free Shipping, Percentage Off, Buy One Get One, or Giveaway. For our purpose here, we’ll choose Percentage Off.
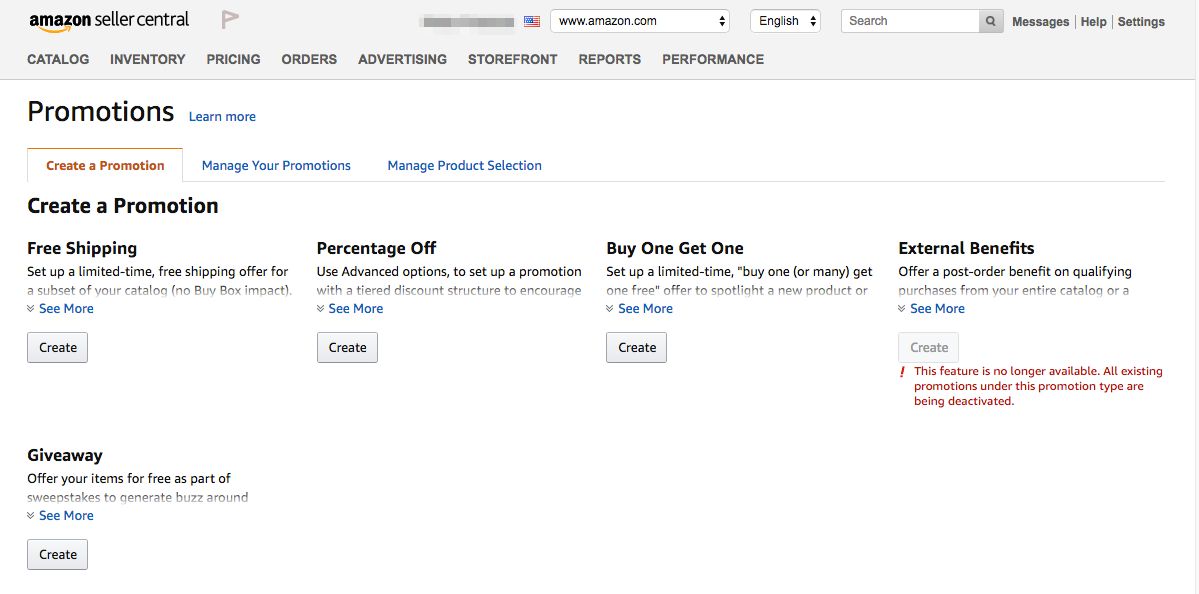
The Create a Promotion: Percentage Off page is divided into three sections - Conditions, Scheduling, and Additional Options. We’ll begin with the first section - Conditions.
3. In the Conditions section, choose the number of items a customer must purchase in order to get the discount from the “At least this quantity” drop down menu. If you simply want to offer a coupon code for a single product, choose “1”. For bulk discounts, choose “2” or more.

4. Now choose “Create a new product selection” at the end of the “Purchased Items” line. This will allow you to choose which products will be discounted. The next page should look like this:
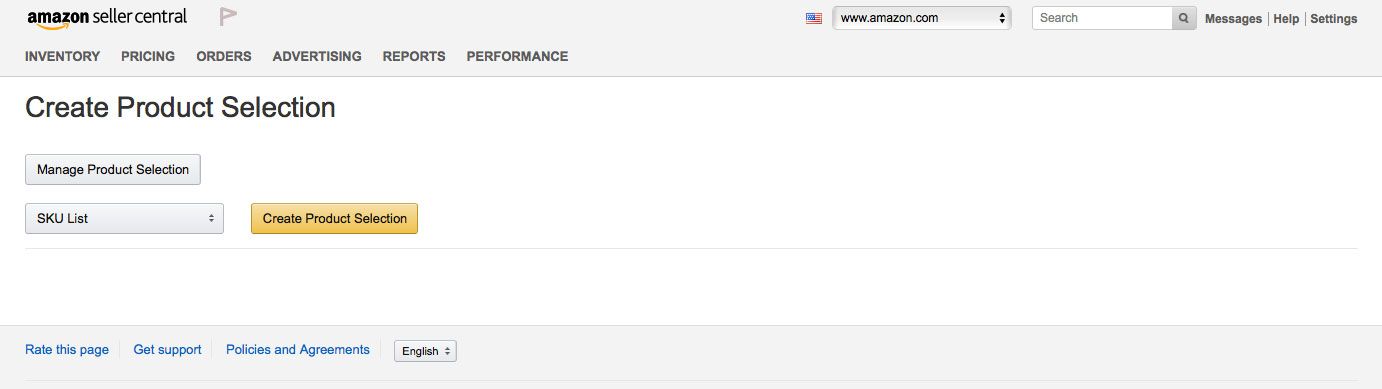
5. From the drop down menu, choose “SKU list”, then click on “Create Product Selection”. Now you can begin to tell Amazon which products to discount.
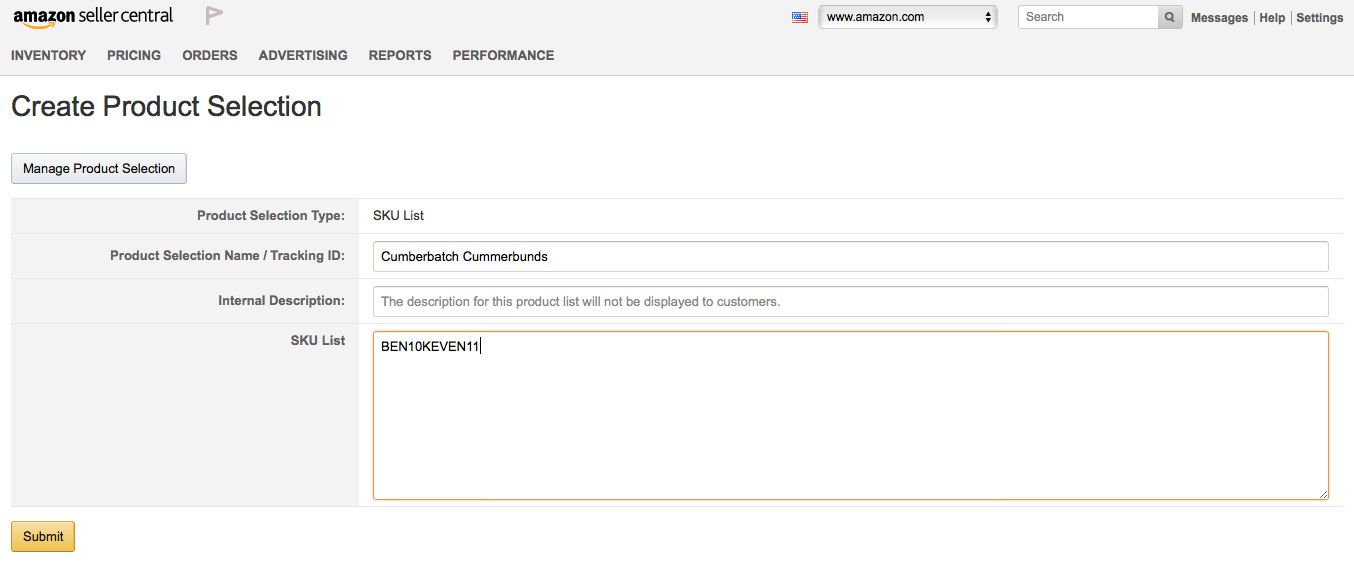
6. On the “Create Product Selection” page, enter the Product Selection Name or Tracking ID for your product, include an internal description for your own use, then enter the SKU number (or numbers) which are attached to the product you wish to discount. (Don’t forget that you can find your SKU in the “Manage Inventory” section of your Seller Central Account.) Once you’ve chosen the SKUs, click on Submit.
7. Once you’ve submitted the SKUs, you will be taken back to the Create a Promotion: Percentage Off page. Now in the “Purchased Items” drop down menu you should choose the Product you just named.
8. On the Buyer Gets line, choose the percentage discount that you would like to offer. For example, if you wish to offer a 40% discount, insert a value of “40.”
9. On the next line, choose “Applies to” “Purchased Items”. (Note: If you’d like to exclude certain items or offer tiered discounts for multiple products purchased, click on “Advanced Options” below the “Applies to” line.)
Congratulations! You finished the first section! Let’s move on to the second section which is fairly easy - Scheduling.
10. Choose the beginning and ending dates and times of your promotion. How long do you want this promotion to be available to customers? (Note: Amazon requires 4 hours to process your promotional code, so you must choose a time at least 4 hours from your current time.)
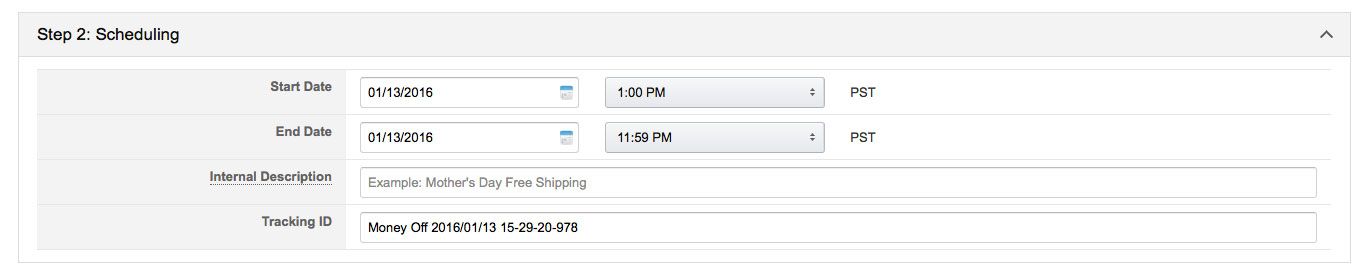
11. If you’d like to include an “Internal Description”, you may, but this is completely for your own reference.
12. You do not need to enter a Tracking ID since Amazon provides one for you.
You completed section two! See, it was easy. Now section three (Additional Options) isn’t difficult, but it is where many sellers make a huge mistake and rapidly lose inventory and money. So pay close attention!
13. Under Step 3: Additional Options, select the “Single-Use” button. If you leave the default selection of “None,” every individual will receive your product for the discounted price whether they have the coupon/claim code or not. If you select the “Group” option, your promotion will have a single claim code but the code can be used by multiple people. So, in the event the code is posted online your entire inventory could sell out very quickly.

Once you’ve clicked on the single-use button, more options will appear like this:
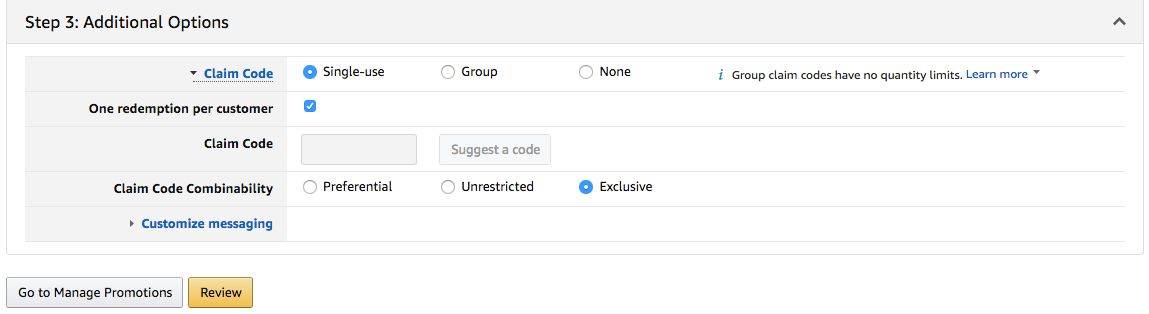
14. Check the box next to “One redemption per customer” to limit every customer to a single discount.
15. To create a claim code, you can allow Amazon to assign one randomly by clicking on “Suggest a code” or you may create your own. Keep in mind that claim codes can only be 8 characters and only numbers and letters. Once you’ve created a claim code, it may not be used for another Amazon promotion.
16. Leave “Claim Code Combinability” at the default “Exclusive”.
17. Click on the blue, highlighted “Customize Messaging” link. This will open the following information:
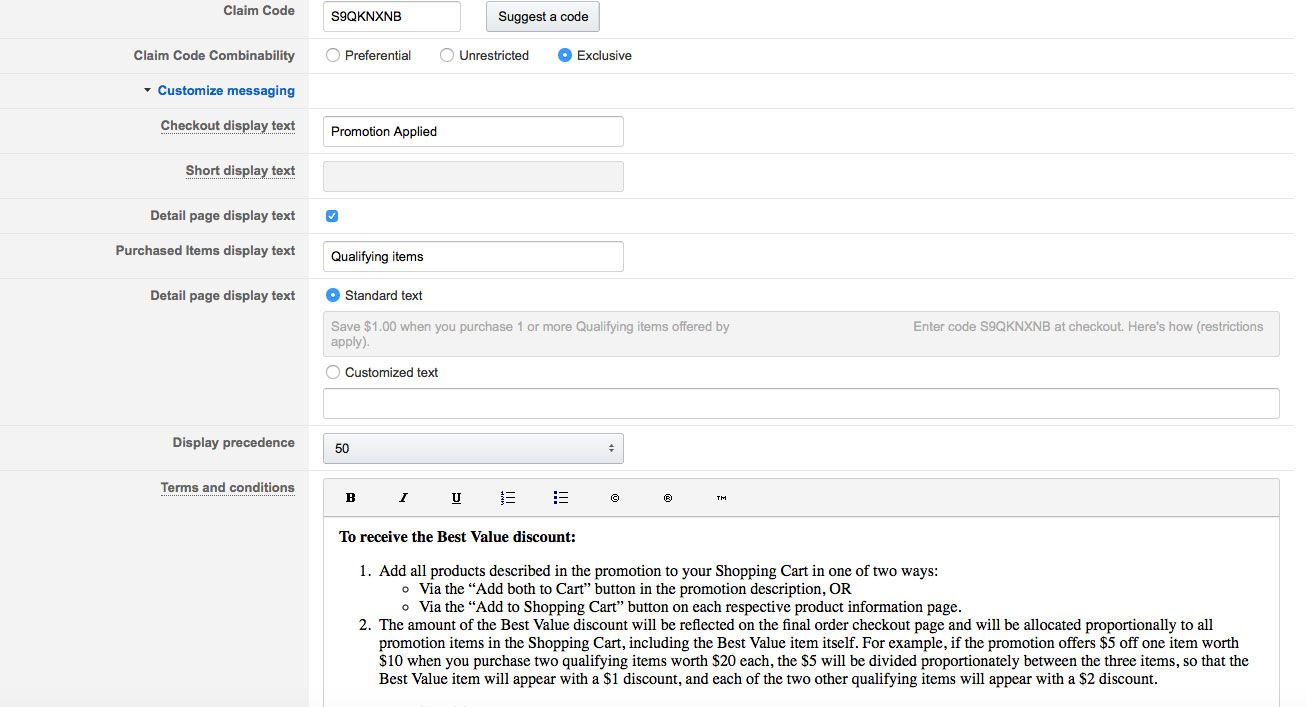
18. It is critical that you UNCHECK the box next to “Detail page display text”. If you do not disable this default choice, every customer will be able to see the details of your promotion and coupon code on your listing.
19. At the bottom of the page, click on Review. This will give you a chance to give a once-over to all the choices you made before you submit the promotion.
20. Once you’ve chosen to submit the promotion, remember to allow 4 hours for the code to process. If you’d like to check on the status, from your Seller Central Account choose Advertising then Promotions then Manage Promotions. There you’ll see whether the Promotion is processing or completed.
Conclusion
Hopefully, these steps will make setting up a promotional campaign much easier for you. By learning to navigate the Promotions section of your Seller Central account, you’ll find that each one gets easier and easier to set up.
Promotional codes are a great way to reward your current customers in your weekly or monthly newsletter. Statistics show that a good majority of customers are more likely to purchase products when they’re offered coupon codes within emails.
So jump in and start learning. Your customers will thank you for it.
Now that you've created your first promotion, take 7 minutes to get Salesbacker up and running so you can get more product reviews. You only need to complete the setup one time and then Salesbacker will automatically let you email your customers to ask for a product review. Free to start — try Salesbacker here.