So you’ve decided to run an ad on Pinterest! That’s a great business move since Pinterest is one of the largest social media platforms out there. As of September 2015, 100 million people actively use Pinterest. That’s not even close to the numbers Facebook is putting up, but Pinterest growth doesn’t appear to be slowing down any time soon. It’s an excellent source of traffic.
One of Pinterest’s strengths that makes it such a good place to advertise is its purchasing power. Nearly every study has shown that Pinterest users are much more likely to purchase a product than those on Facebook or Twitter. According to an Adweek infographic, 49% of Pinterest users would choose to browse Pinterest over a catalog, and 30% of Pinterest mobile users were using the app in the store to help them decide on purchases. So it seems that Pinterest has created a platform where customers are not just sharing. They’re shopping.
Thankfully, Pinterest has made their advertising platform fairly user friendly. But before you start the process of creating your first ad, make sure you take care of the following first:
- Create your Pinterest business account (here's how to do that).
- Create boards and begin pinning relevant content to them.
- Begin following other Pinterest users or brands related to your product.
- Sign up to use Pinterest Ads (Promoted Pins). Just because you have a Pinterest business account doesn’t mean you have access to advertising. You can sign up at ads.pinterest.com.
- Be sure to create the Pin you’d like to promote and pin it to one of your boards. During the ad creation process, you’ll be asked to choose that pin from your board.
Once these steps are completed, you’re on your way to creating your first Pinterest Promoted Pin. Let’s get started:
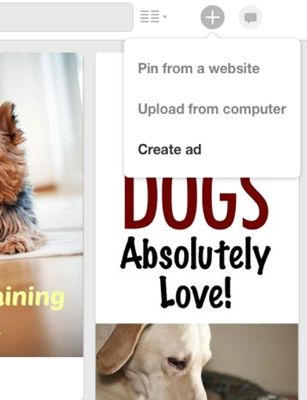
1. ACCESS THE PINTEREST ADVERTISING PAGE. You can do this by clicking on the plus sign (+) at the top right corner of your Pinterest page. Click on “Create Ad”.
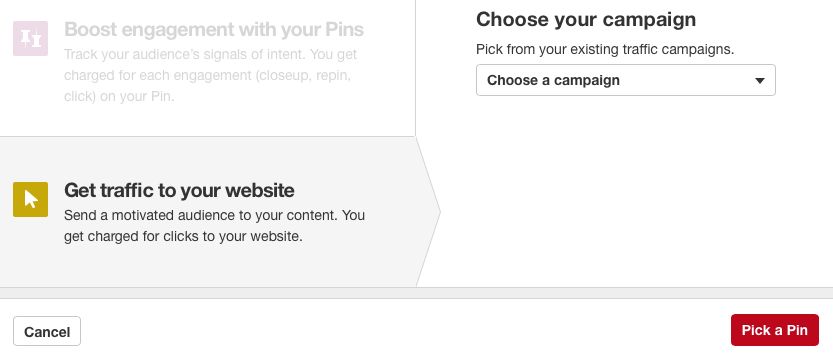
2. CHOOSE THE GOAL OF YOUR CAMPAIGN. On this page you can choose two different goals you’d like to reach with your ad. For most Amazon sellers, you’re going to want to drive traffic to your Amazon page, your website, or a lead page. So for this example, we’ll choose “Get Traffic To Your Website”.
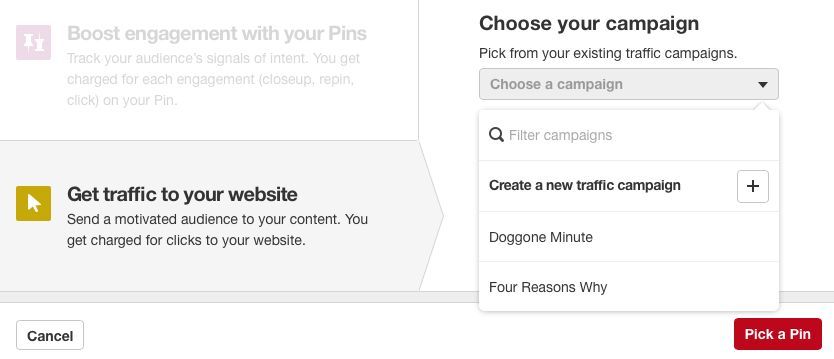
3. CREATE A NEW TRAFFIC CAMPAIGN. When you’ve chosen your campaign goal, you’ll then be asked to choose a campaign. If you’ve already ran an ad or set of ads on Pinterest before, you can choose the name of that past campaign. But if this is your first ad, simply click on “Create a New Traffic Campaign”.
4. CHOOSE A NAME FOR YOUR CAMPAIGN. If you’d like to run a set of Christmas ads, you might name the campaign “Christmas 2016”. This will allow you to add more promoted pins to the same campaign later.
5. CHOOSE AN END DATE FOR YOUR CAMPAIGN. Now, of course, Pinterest doesn’t require an end date because they’d love for you to keep spending ad dollars, but if this is your first time, I’d choose no longer than one week. This ensures that you won’t be continually charged if you happen to get distracted and forget to check back on your ad. You can always go back into the campaign and revise these dates later.
6. CHOOSE A DAILY BUDGET FOR YOUR CAMPAIGN. Here you can decide the maximum amount of money you’d like to spend on your ad each day. Once your ad has reached that maximum, you won’t be charged any more that day. To do this most effectively, calculate how much you can afford in the one week it will run, then divide that number into 7. For our example, we chose $5 per day which means we’ll spend no more than $35 in one week.
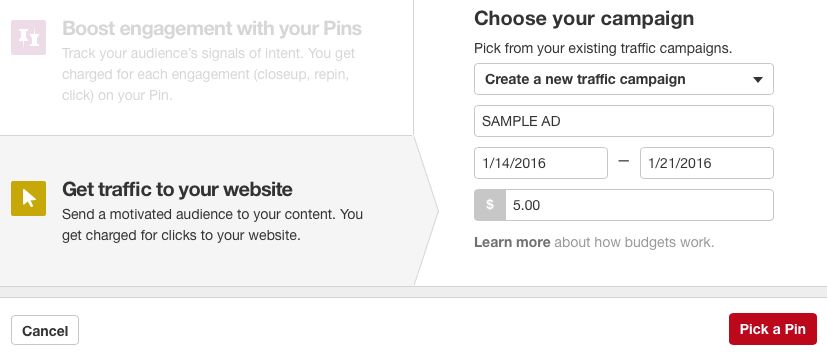
7. PICK A PIN YOU WISH TO USE FOR YOUR AD. Remember, the pin must already be created and pinned to one of your boards before you’ve reached this point. When you click on the red “Pick a Pin” button, you’ll be taken to a list of your latest pins. You may only choose one pin. You can scroll down to find the appropriate pin or use the search feature to find it.

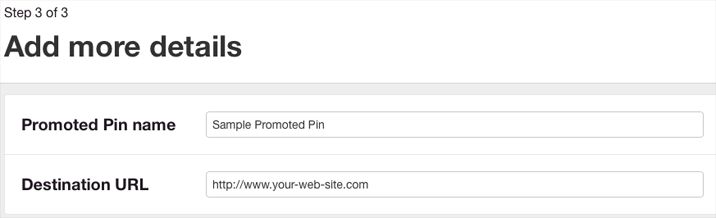
8. GIVE YOUR PROMOTED PIN A NAME AND DESTINATION. You don’t have to name the pin, but it may help remind you about the content of that pin in the future. Choosing the destination url is extremely important because this is where every Pinterest user will be taken if they click on your pin. Be sure that you put the correct url for your Amazon site, website, or lead page you wish to use. Without this url, your ad will be worthless.
9. CHOOSE KEY SEARCH TERMS TO ATTACH TO YOUR AD. In the “Terms” section, you’ll be given a chance to determine key search terms for your ad. This will target customers who are searching for those same terms. But don’t worry. Pinterest only asks that you search for a keyword, then they’ll suggest actual key terms to use. For our example, we’ll enter the keyword “Labrador Retriever”.
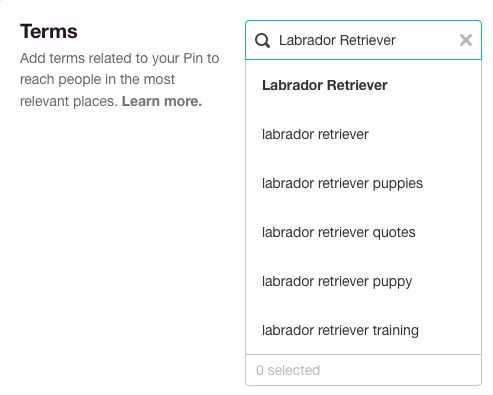
Notice that I can now choose from a list of terms related to Labrador Retriever. I’ll choose the first one and be given several search terms to choose from.
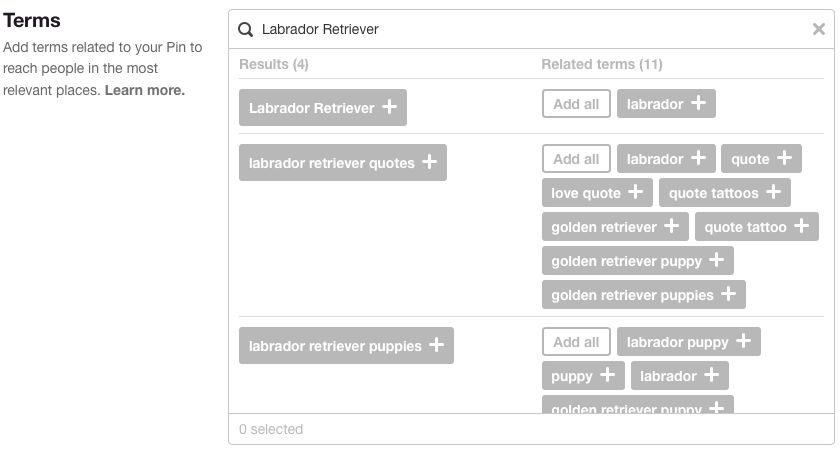
Some of these suggestions will be relevant while others will not. You can choose whichever you feel is most valuable or specific to your Promoted Pin. To choose the key word, simply click on the plus sign and the terms will appear below the search box.

To choose additional key words, simply delete your first search and enter another. You may add as many search terms to your ad as you want (or as many as you can afford).
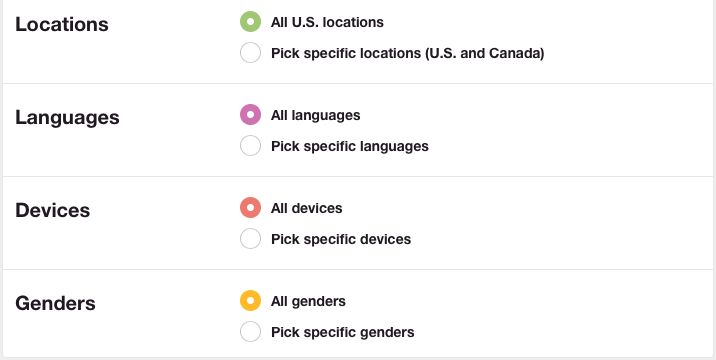
10. CHOOSE THE LOCATION, LANGUAGES, DEVICES, AND GENDERS FOR YOUR PIN.
If you’re selling on Amazon in the U.S., you may want to narrow your location to the States.
If your ad is in English, you’ll probably only want to choose the English selections in the Language section.
Pinterest users are very mobile friendly, so I suggest you choose “All Devices”.
As far as genders go, it’s no surprise that women make up the largest majority of Pinterest users. However, the male market is growing rapidly and shouldn’t change the cost of your pin.
11. CHOOSE YOUR MAXIMUM CPC BID. Now it’s time to make a choice as to how much you are willing to pay for every time a Pinterest user clicks through to your website. Remember, you’ve already chosen your daily budget, so your number of clicks per day will be determined by your Maximum CPC Bid.
You’ll also notice that below the bid box Pinterest provides you with an estimate of what other advertisers are paying. This does not mean a lower bid will not be approved. It simply means you will get less exposure. As you insert your bid, Pinterest engages in a bit of psychological tactics to influence your bid amount. Notice the “warnings” given if you offer a lower bid.

These “warnings” are all color coded from reddish pink to green to give the impression that you should never choose a yellow “low” bid. Simply disregard this. There is a minimum cost for Promoted Pins ($0.10), but your pin will still be approved even with a “too low” or “low” bid.
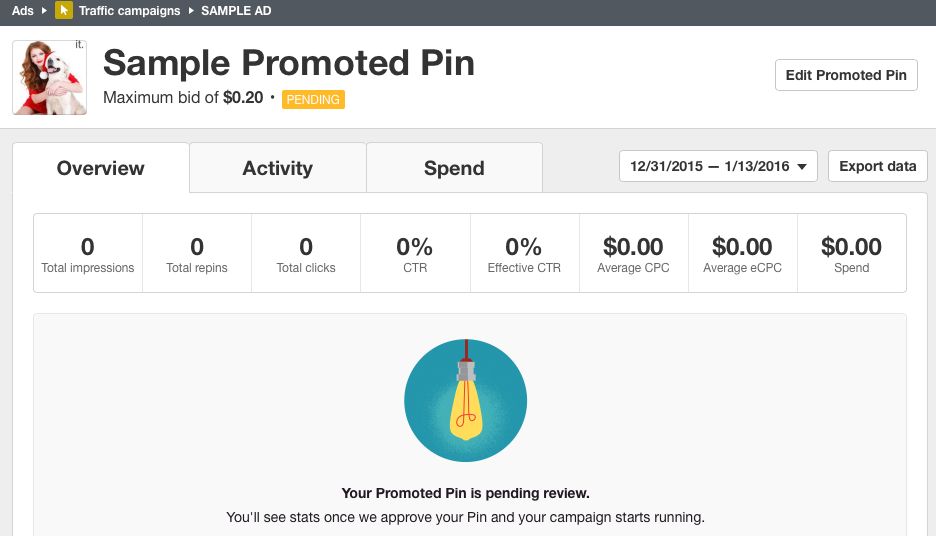
12. CLICK ON PROMOTE TO BEGIN PROCESSING YOUR PIN. Once you’ve clicked the “Promote” button, you’ll be taken to your new campaign’s analytics page. You should see that your pin is still “Pending” as it goes through Pinterest’s automated approval process. If your pin is not approved, you should receive notification by email within 24 hours. If it is approved, it may take 48 hours for your statistics to begin to populate within your analytics page.
Conclusion
Congratulations on creating your first Promoted Pin and on making the smart move to advertise on Pinterest. Each time you create a Promoted Pin, you should get better at navigating the process and narrowing down your key terms. Eventually, you should begin to see upticks in your Amazon or website traffic by using Pinterest more effectively.
Be sure to monitor your Promoted Pins carefully to analyze data and make wise decisions on what to promote and who to promote to. Pinterest provides some great statistics within their analytic platform that can give you great insight into your customer base.