You will need reviews for your product after you set up your product listing. After you finish reading this blog post you can start using Salesbacker for free to help get more product reviews. Click here to begin.
This guide is meant to walk you through the steps of setting up your first Amazon listing. Although each product is unique and may require additional fields on Amazon, this step-by-step will cover all of the basics.
By the end of this article, you should be able to take each step yourself and use them to create your own Amazon product listing. For the sake of example, I’ll be creating a listing for a water bottle, and because this isn’t a true product of mine, I won’t make it through all the shipping setup.
Let’s jump in!
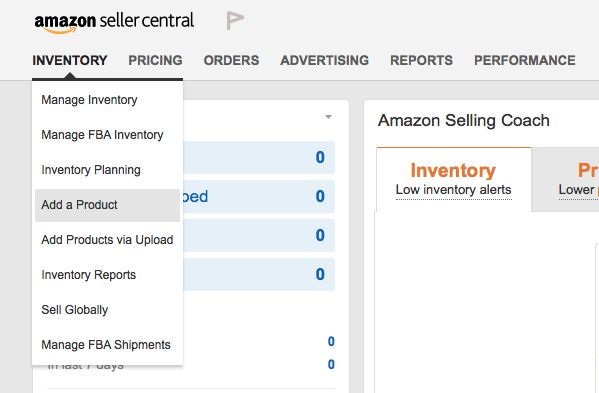
STEP #1: After logging into your Seller Central account, click on “Add a Product” under the Inventory drop down menu. (Note: You can also upload products by clicking on “Add Products via Upload”. This method is beneficial for various kinds of products, but if this is your first listing, you may be overwhelmed by the spreadsheets involved.)
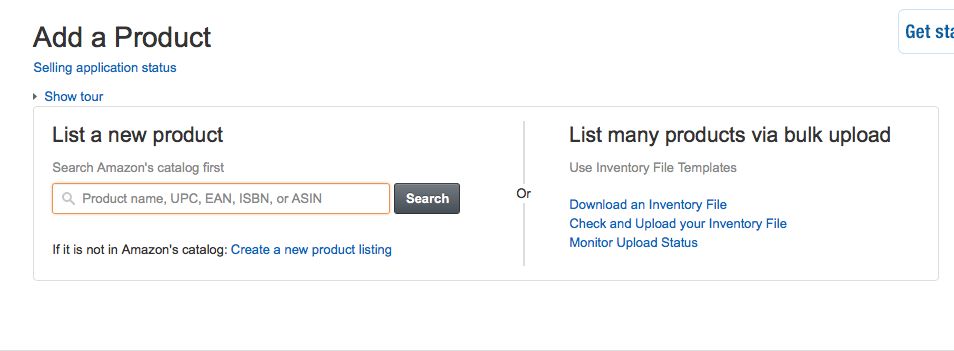
STEP #2: On the Add a Product page, you may choose from three methods. First, you can add a product which is already on Amazon. You can do this by searching for the product by name or product ID. Second, you can click on “Create a new product listing” just below the search box. This is to be used if you are uploading a brand new product that is not currently selling on Amazon. Third, if you’re wanting to upload multiple products at once, you can use the “bulk upload” feature to the right of the screen.
For the sake of this guide, I’ll be showing you how to create a new product listing with the second method.
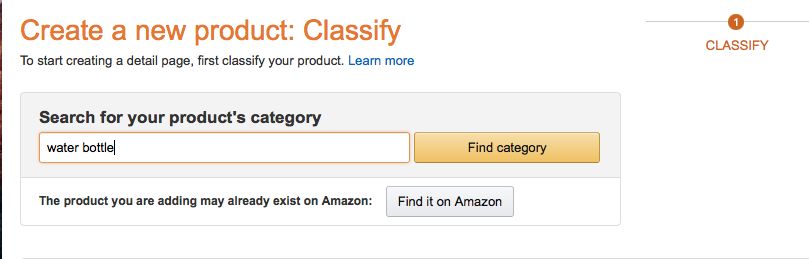
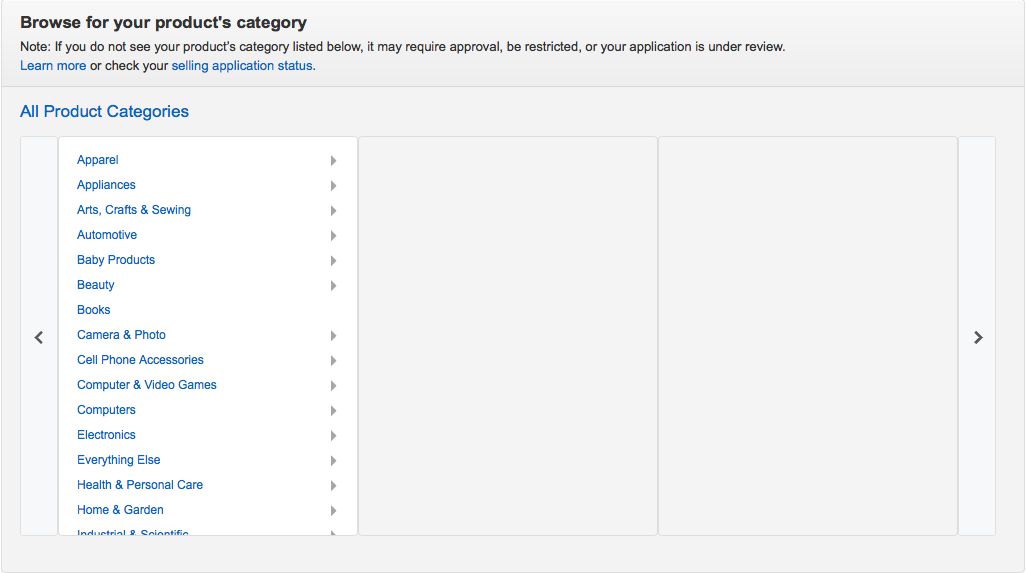
STEP #3: Once you’ve clicked on “Create a new product listing”, you’ll be asked to assign your new product to an Amazon category. You may find the category one of two ways: using the search feature or by browsing the categories.
For sake of ease, I like to simply use the search engine function.
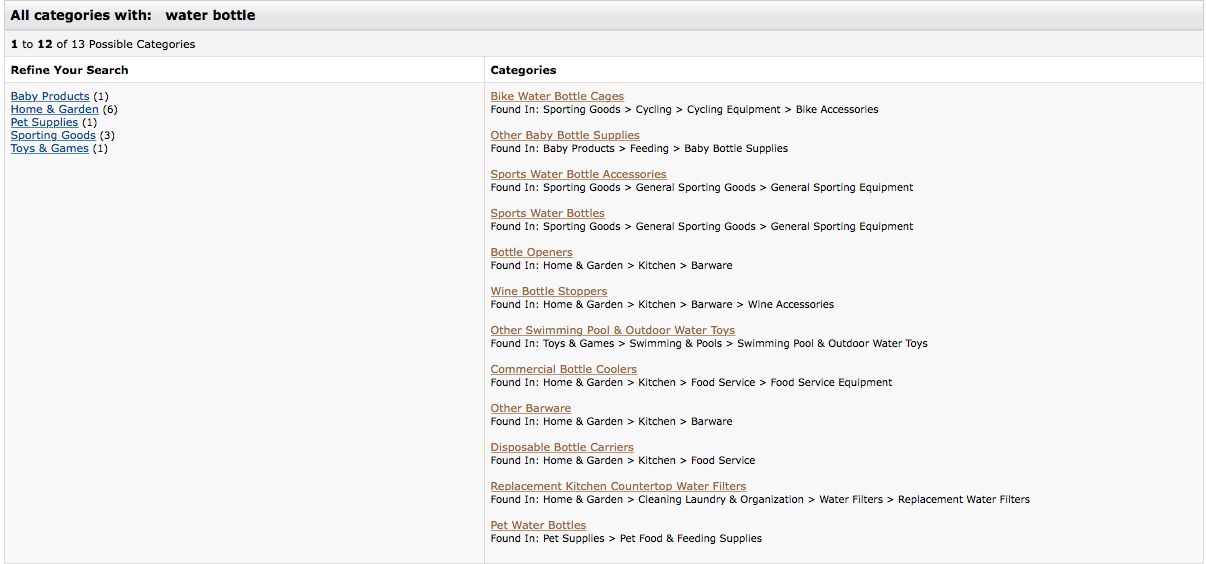
STEP #4: After typing your product into the search bar, you’ll be given all of the possible categories for that specific product. For my water bottle, I am given 12 different choices in which my water bottle will fit. Choose the one that is most appropriate to your product.
For my water bottle, I’ll choose the fourth option, “Sports Water Bottles”.
STEP #5: Fill in the Listing Info for your new product. On the next page, you’ll notice that your listing information is divided into 7 tabs: Vital Info, Variations, Offer, Images, Description, Keywords, and More Details.

I’ll walk you through the major fields of each tab, but let’s start with the first tab - Vital Info.
Tab #1 - Vital Info
1. Product Name:

Your product name will be the title each customer sees on your listing. It’s essential that you pack as many keywords and features as possible into your title. Instead of simply using “Water Bottle” as my product name, I used “Lightweight Insulated Water Bottle, 18 oz., for hiking, camping, biking, and work”. And my title could continue as long as I stay within the 250 characters limit.
For more direction as to how to create your title, check out our other article “How To Optimize Your Amazon Product Title”.
2. Manufacturer and Brand Name

If you’re selling your own private-label product, you’ll simply use your brand/company name for both of these fields.
3. Manufacturer Part Number

You won’t need this unless you’re product is actually a replacement part for another product.
4. Package Quantity

Since I’m not selling a 2 or 3 pack of water bottles, I’ll enter 1 here.
5. Material Type

Click inside the field to be given a list of materials to choose from. I’ll pretend my water bottle is made of plastic.
6. Color and Color Map

I enter the color of my product, but I leave the Color Map field empty. If you’re planning on selling multiple colors, you’ll make that clear when we come to the Variety tab.
7. Shape

If this doesn’t apply to your product, leave it blank. I used “Round”, but I think most customers would guess that.
8. Lens Color

You can leave this blank as well unless your product actually has a colored lens.
9. Size

Here I could use either 18 oz. or X-Large, depending on what I want to emphasize.
10. Hand Orientation and Tension Supported

Neither of these apply to my water bottle.
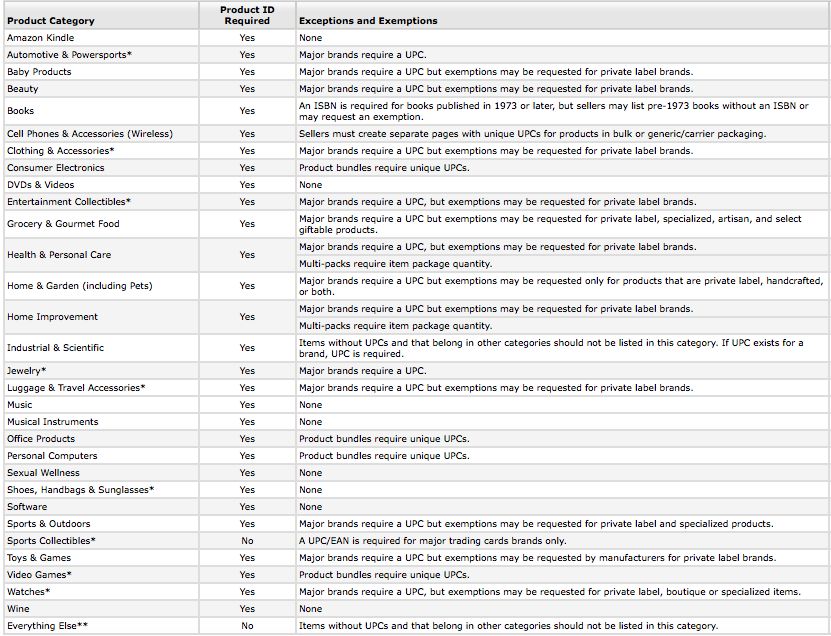
11. GTIN Exemption Reason

Most products are required to have a GTIN (Global Trade Identifier Number) which is generally something like a UPC or (for books) an ISBN. However, you can be given an exemption depending on your product category. If you’re interested in pursuing an exemption, here’s Amazon’s guide to product categories and exemption possibilities:
12. Related Product ID Type and Related Product ID

If your product is linked to another product, you should enter the other product’s ID here. For example, if my water bottle was only compatible with a specific bicycle, then I’d link my water bottle to the bike’s UPC here. If your product is a solo product, leave these fields empty.
13. Item Display Dimensions and Weight


Here, you’ll enter the length, width, and weight of your product.
14. Weight Supported and Display Maximum Weight Recommendations

These don’t apply to the water bottle, but if your item is designed to support weight, then give the customer that information in these fields.
15. Shaft Length

Moving on.
16. Product ID

As I stated above, every product will need a Product ID in order to be sold on Amazon. This ID (generally a UPC) will distinguish your product from every other product. You can check with the manufacturer for this information or if you've created a private label product you'll want to purchase a UPC code for your new product. There are a variety of websites that sell UPC codes in various bundles (just search for cheap UPC barcodes).
Congratulations! You’ve completed the first tab of information in your listing. Let’s move on to the second tab, Variations.
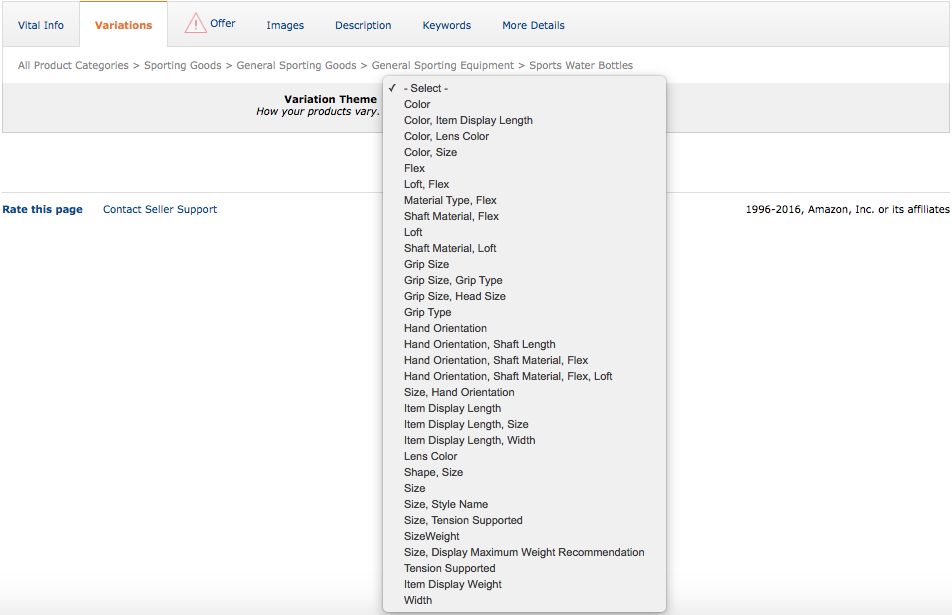
Tab #2 - Variations
If your product will come in a variety of colors or sizes or any other distinct varieties, you’ll need to indicate that here. Simply open the drop down menu and choose the type of variation that fits your product.
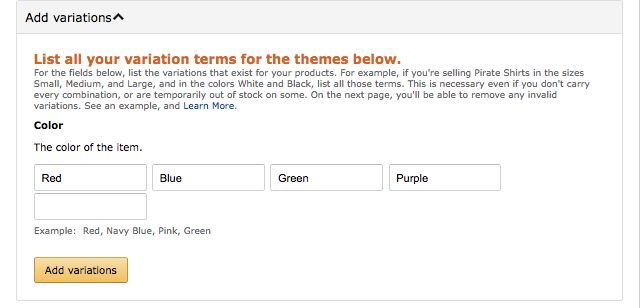
After you’ve chosen a variation, more fields will be revealed to give extra clarification to your product listing. Simply fill in the different variations you have within that theme, then click Add variations.
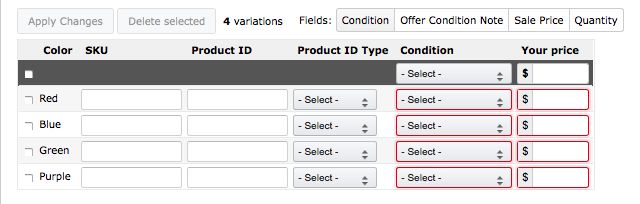
Once you’ve added the variations, they will appear below. Now simply fill in the appropriate information for each variation, and you’re done!
One more tab done! On to the next!
Tab #3 - Offer
1. Import Designation
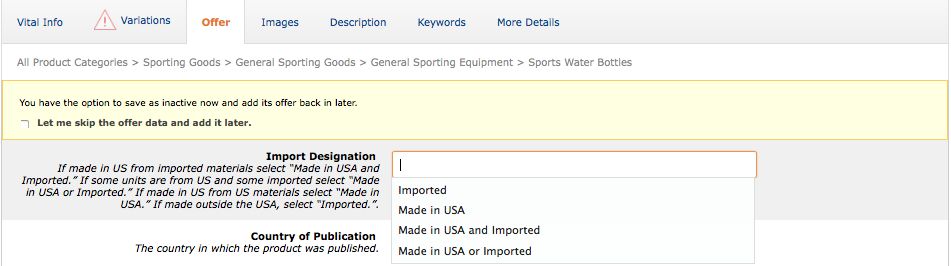
You are not required to fill in this tab, but if it will help you, choose the appropriate designation.
2. Country of Publication
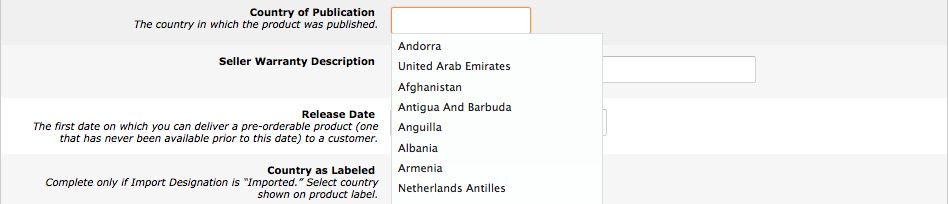
Skip this unless your product was published.
3. Seller Warranty Description

If you offer any kind of warranty or guarantee on your product, enter it here. I typed, “If for any reason you are unhappy with the water bottle, we offer a full, money-back guarantee.”
4. Release Date

If you wish customers to know when you released this product, do so here. Most sellers will leave this blank.
5. Country as Labeled

If your product was not made in the USA and your label reveals the origin country, you can include that information here.
6. Is Gift Wrap Available and Offering Can Be Gift Messaged

If you’re not using Fulfillment by Amazon and want to allow for gift wrapping and gift messages for your product, you can do that here.
7. Tax Code

If you are using Amazon tax collection services, you can enter your code here.
8. Fulfillment Latency

If you’re not using Fulfillment by Amazon, you can indicate the time it will take for you to ship the product once it has been ordered.
9. Restock Date

You can leave this field empty.
10. Legal Disclaimer

Mine reads, “As always, please read and comply with all labels and warnings”.If you’re not sure about the exact wording of your disclaimer, consult your manufacturer or seek legal aid.
11. Start selling date

Simply choose the date on which you’d like your product to be available on Amazon.
12. Signed By

If your product is signed by an individual, you can include that information here.
13. Fulfillment Channel

At this point, you’ll choose whether you want to fulfill the orders of your product or allow Amazon to fulfill them. I heartily recommend using Fulfillment by Amazon if at all possible.
Boom! You’re done with Tab #3!
Tab #4 - Images
On the Images tab, simply upload the appropriate images for your product. Remember to comply with the guidelines given by Amazon on this page.
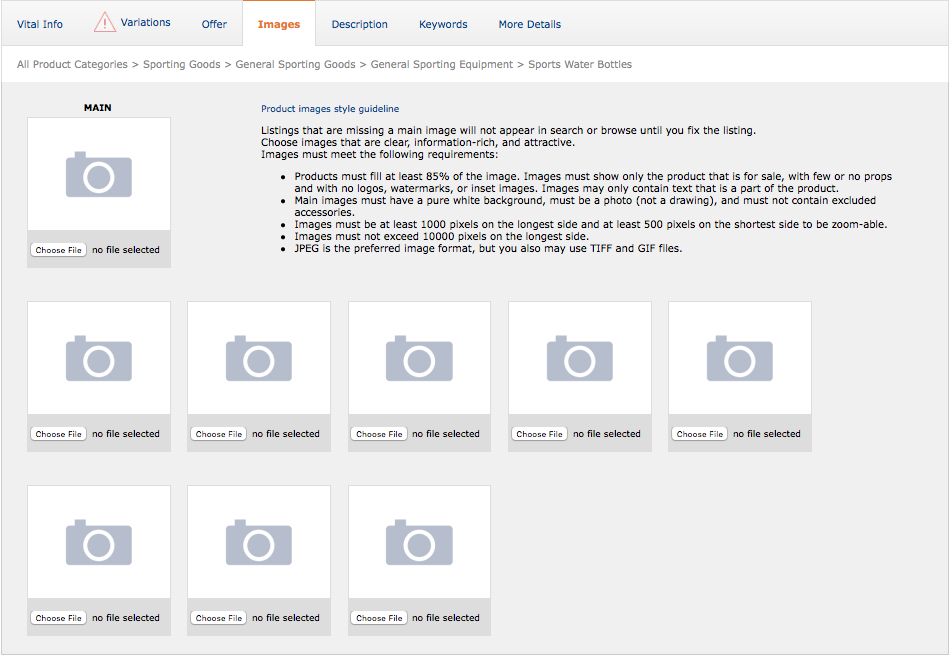
If you want more direction for your product images, be sure to check out our other article, Four Photo Fails to Avoid on Your Amazon Listing.
Tab #5 - Description
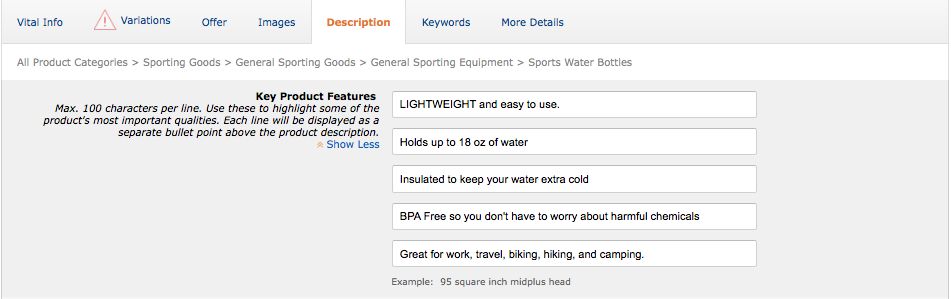
The Description tab is divided into two sections: Key Product Features and Product Description.
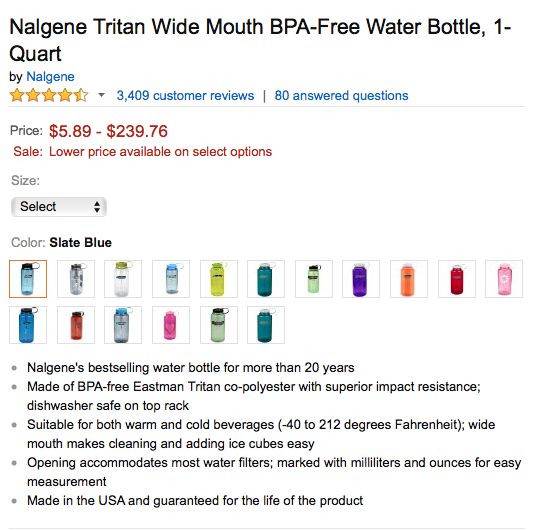
Key Product Features
The Key Product Features fields will become your bullet points of located near the top of your listing, like this water bottle listing:
There are two facts you need to know about your product features:
1) Though Amazon claims it does not, many expert sellers have verified proof that Amazon ranks your product based upon keywords within your product feature bullet points. I recommend shoving as many unique keywords as you can into these features.
2) Amazon says they limit you to 100 characters per field. However, if you use more, the words still appear on your listing (they don’t truncate the sentence). Now, Amazon may eventually begin cracking down on lengths of your Key Features, but as of now, they don’t seem to mind. My recommendation? Use as much space as you can, and fill that space with keywords.
Product Description
The Product Description is one more opportunity to sell your product to your customer.

Use this field to sell the customer on the benefits of your product. Don’t just talk about the features, but aim to explain how your product solves your customer’s problems. You will be limited to 2,000 characters.
Woohoo! You’re on to Tab #6!
Tab #6 - Keywords
Your Keyword tab is a key part of your Amazon listing. Although no customer will actually see the information you input here, Amazon will use this information whenever customers search for your product or related products.
Search Terms
Fill each search term field with as many unique keywords as you can, and separate each keywords with a comma. Remember, there is no need to repeat keywords, so if you’ve used a keyword in your title or bullet points, you won’t need to use it again here.
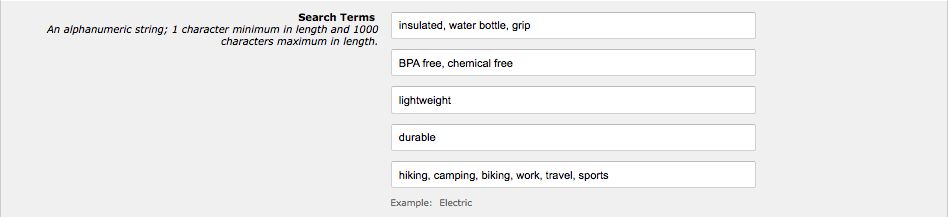
This is why intense research into your keywords is so essential. You want to have enough keywords to use in your title, bullet points, and in these search terms.
Platinum Keywords
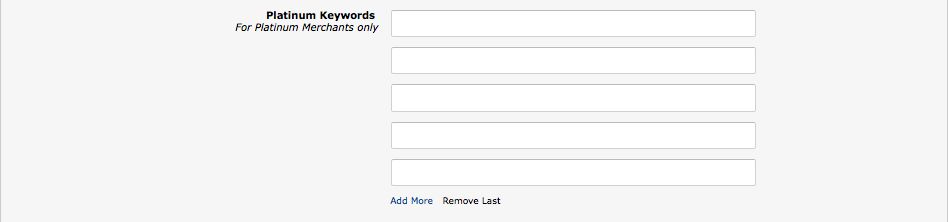
You are not a Platinum Seller, so move along.
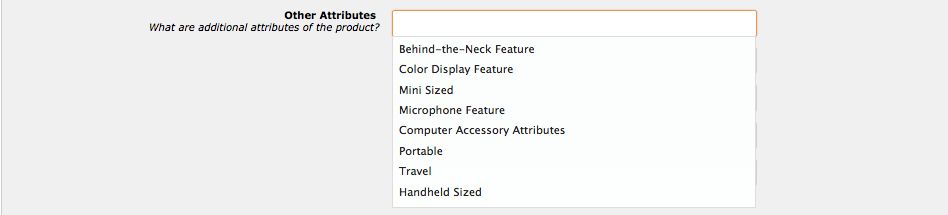
Subject Matter, Other Attributes, Intended Use, and Target Audience
The next four sections are all fields based on drop down menus. Simply click on each field, and you’ll be given a drop down menu of related choices.
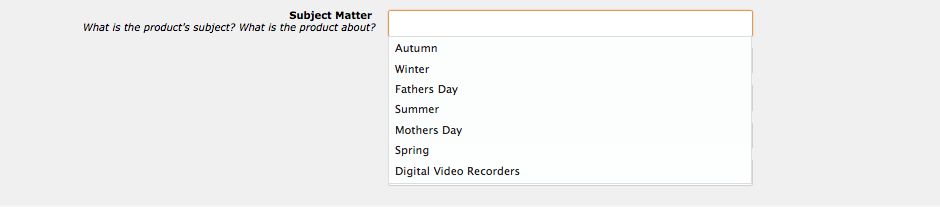


You may be tempted to skip this part of the process since it does take some time to complete (and by tab #6, you’re sick of it). But remember, Amazon uses all of this information to catalog your product for customer searches.
Why not give them as much information as possible?
Oh, and by the way, you’re on your last tab!
Tab #7 - More Details
I’m not going to walk through the More Details blog for three reasons:
1) This tab is customized based upon your product category. If you’re not in the water bottle category, it won’t help you to show you how to fill this section out because my fields will be different than yours.
2) It’s pretty self-explanatory. You simply walk through every field and fill in as many as you can. Some fields will have nothing to do with your specific product, but others could be helpful for Amazon to know about.
3) This is the longest tab out of them all!
But I do need to point out that this is the tab on which your price is determined. You should have two specific places to enter a price:
- Manufacturer’s Suggested Retail Price: This is not the price your customer will pay. It’s only the price you determine a customer could pay if you weren’t so generous. On your actual listing, it appears as the list price. In the example below, the seller entered $35.95 into their Manufacturer’s Suggested Retail Price field.
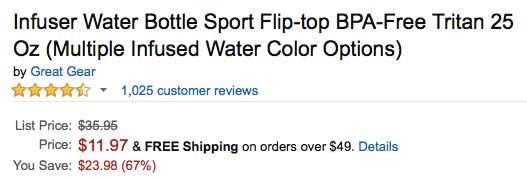
In the end, this price becomes an “anchor price” for your product. It gives your
customer a sense of comparison and evokes the sensation of a good deal. Choose
this wisely.
- Sale Price: The Sale Price is the actual price your customer will pay on your listing. In the above previous example, it’s the $11.97 below the List Price. If you’d like more direction on finding the right price for your product, follow my three-step process in our article, Follow These Three Steps to Determine Your Pricing Sweet Spot.
As I said before, the rest of the fields should be fairly explanatory and customized to your fields. Remember that many of these fields are optional, so if you don’t understand them, you can probably skip over them.
Conclusion
Once you’ve walked through each of these steps and filled in the essential information for your product, it’s time to click on the “Save and Finish” link at the bottom.
If the link is still shaded out (not allowing you to click on it), this is due to a missing piece of essential information. Look back at the tabs and see if there are any that are tagged with a caution exclamation icon.

If so, go to that tab and fill in the field that is highlighted in red.
If you are still having difficulty, don’t hesitate to use Amazon support by opening another browser window and going back to your main Seller Central dashboard. Click on the “Help” link in the top, right-hand corner of the page, then follow the appropriate steps.
Three cheers for you! You just completed all of the steps required to get your product up on an official Amazon listing!
Of course, you still have to set up your shipping options if you’re using Amazon FBA, but if you can handle the listing part, shipping will be a breeze.
And depending on your product, you may have a few more fields to fill in. But by now, all of your basic info should be good to go.
Keep plugging away! You’ve got sales waiting!
Alright you finished reading. Now that you've set up your product listing, your next step is to focus on getting product reviews. One of the best ways to get product reviews is to simply ask your customers. Use Salesbacker to automate the process of asking for reviews (takes less than 7 minutes to get up and running). Click here to start for free.